Ever stripped a screw mid-project and wanted to throw your drill across the yard? I’ve been there. But here’s what I learned after fifteen years of DIY projects: most fastener failures aren’t about the hardware—they’re about the installation. And when it comes to stainless steel fasteners, the rules change completely.
Let me walk you through exactly how to install stainless steel fasteners the right way, so your outdoor deck doesn’t become a rust-stained disaster and your marine projects actually last.
Why Stainless Steel Fasteners Demand Different Treatment
Before we dive into the how-to, let’s address the elephant in the room: why can’t you just treat stainless steel screws like regular hardware?
The answer lies in the material itself. Stainless steel is harder and less forgiving than standard steel. It’s corrosion-resistant, sure, but it’s also prone to a phenomenon called galling—essentially, the fastener cold-welds to itself during installation. I learned this the hard way when I seized three bolts on my first outdoor furniture project. Expensive lesson.
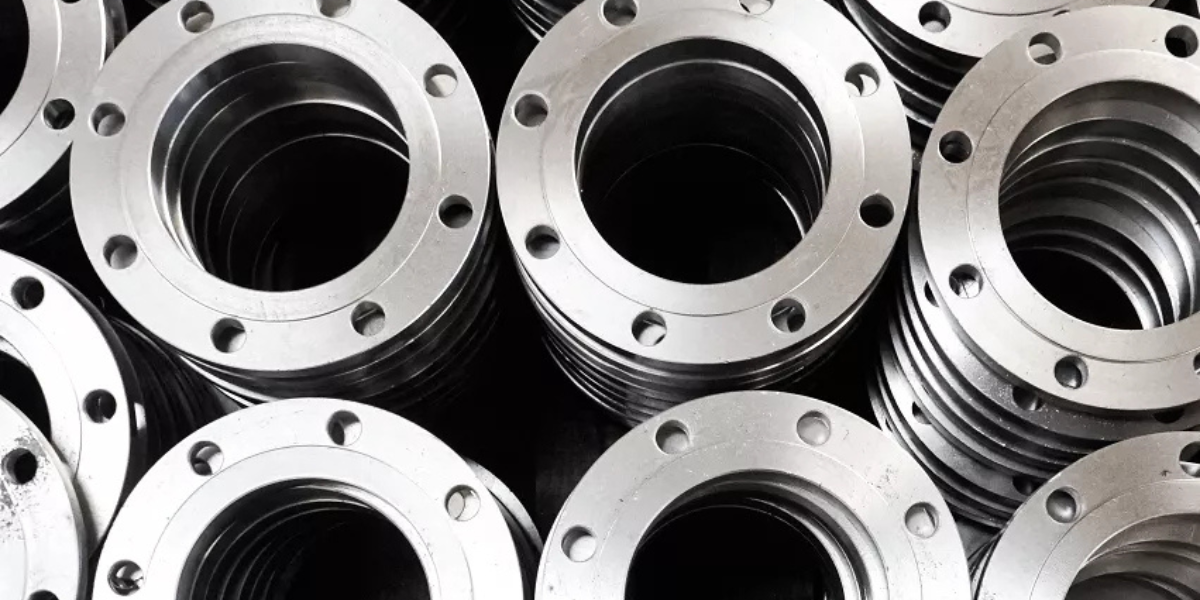
But when installed correctly, corrosion resistant screws for outdoor use will outlast virtually any other fastener you can buy. That’s why decks, marine applications, and coastal construction rely on them almost exclusively.
Essential Tools for Installing Stainless Steel Screws
Here’s where most DIY guides get it wrong—they assume you can use the same tools as regular fasteners. You can’t. Not if you want professional results.
The Non-Negotiable Tool List
Impact-rated drill bits: Standard bits will dull almost immediately on stainless steel. I burned through three regular bits before someone told me this. Learn from my mistakes.
Variable-speed drill or impact driver: Control is everything with stainless steel. You need the ability to slow down, especially when you’re close to seated.
Torque wrench: For critical applications like structural bolts, guessing isn’t good enough. More on this shortly.
Anti-seize compound or lubricant: This is your insurance policy against galling. Never skip it.
Properly sized drivers and sockets: Stainless steel strips easily. A loose-fitting driver is a guaranteed way to ruin your fastener head.
The Tools That Make Life Easier
Countersink bit for flush mounting, center punch for accurate pilot holes, and marine-grade lubricant for extreme outdoor applications. These aren’t mandatory, but they transform installation from frustrating to satisfying.
How to Install Stainless Steel Fasteners: Step-by-Step Process
Now let’s get into the actual installation. This is the process I follow on every project, whether I’m mounting deck railings or installing outdoor light fixtures.
Step 1: Prepare Your Pilot Holes Correctly
This is critical. Stainless steel fasteners require pilot holes—even in soft materials like wood. Skip this, and you’re asking for split wood, stripped heads, or worse.
For screws, drill a pilot hole about 90% of the screw’s core diameter. For bolts, match the shaft diameter exactly. In hardwood, I go to the full depth of the screw. In softwood, I stop at about two-thirds depth.
Pro tip: Use a drill bit diameter gauge. Eyeballing it is how you end up with loose connections or cracked material.
Step 2: Apply Lubricant to Prevent Galling in SS Fasteners
Preventing galling in SS fasteners isn’t optional—it’s mandatory. I use either anti-seize compound or a specialized fastener lubricant on every single stainless steel installation.
Apply a thin coat to the threads and the underside of the bolt head or screw head. Don’t glob it on; you want lubrication, not a mess. For outdoor applications, I prefer marine-grade anti-seize that won’t wash away in the first rainstorm.
Here’s something nobody tells you: even brand-new fasteners can gall. The problem isn’t dirt or damage—it’s metal-to-metal friction under pressure. Lubrication eliminates that friction.
Tightening Stainless Steel Bolts Properly: The Technique That Matters
This is where experience really shows. Tightening stainless steel bolts properly requires a different approach than regular fasteners.
The Two-Stage Tightening Method
Start with hand-tightening or low-speed power tightening until the fastener is finger-tight. This seats the fastener without creating excessive friction.
Then—and this is crucial—switch to low speed and apply steady, even pressure. No jerking motions. No “one more quarter turn just to be sure.” Smooth and controlled wins every time.
For screws, I set my impact driver to its lowest torque setting and let the tool do the work. The moment I feel resistance increase noticeably, I stop. With stainless steel, over-tightening doesn’t make things more secure—it makes them permanently stuck or stripped.
Recognizing the Sweet Spot
How do you know when it’s tight enough? The fastener should be snug with no play, but you shouldn’t be straining to turn it. If you’re putting your full body weight into it, you’ve gone too far.
For structural applications, this isn’t good enough. That’s where torque specifications come in.
Stainless Steel Fastener Torque Tips for Critical Applications
When I’m installing anything structural—deck ledger boards, heavy outdoor equipment, or load-bearing brackets—I don’t trust feel alone. I use a torque wrench and follow the manufacturer’s specifications.
Understanding Torque Values
Stainless steel fastener torque tips start with knowing that stainless steel requires about 30-40% less torque than comparable steel fasteners due to increased friction. If you apply steel torque values to stainless steel, you’ll gall threads or snap bolts.
Here’s my reference approach:
- For 1/4″ stainless steel bolts: 6-9 ft-lbs
- For 5/16″ bolts: 11-17 ft-lbs
- For 3/8″ bolts: 20-30 ft-lbs
- For 1/2″ bolts: 45-70 ft-lbs
Always verify with the fastener manufacturer when possible. Marine-grade and structural fasteners often have specific requirements.
The Pattern Matters
For multi-bolt installations, tighten in a star or cross pattern, bringing all fasteners to about 50% torque first, then making a second pass to full torque. This ensures even pressure distribution and prevents warping.
DIY Home Hardware Installation: Common Applications
Let me share the installations I do most frequently and the specific techniques that work.
Outdoor Deck Installation
For deck boards, I use stainless steel screws exclusively. The wood expands and contracts with weather, and regular fasteners just don’t last. I pre-drill every hole—yes, even in pressure-treated pine—and use screws long enough to penetrate the joist by at least 1.5 inches.
The investment in corrosion resistant screws for outdoor use pays for itself within two years when you’re not replacing rusted-out fasteners.
Stainless Steel Anchors Installation
Wall anchors are a completely different challenge. For stainless steel anchors installation in concrete or masonry, here’s my process:
Drill the hole to the exact diameter specified—not bigger, not smaller. Clean out all dust with compressed air or a vacuum. Tap the anchor in flush with the surface using a hammer and punch, never a drill. Then install your bolt or screw according to the anchor’s torque specifications.
I’ve seen people try to drill anchor holes with masonry bits that are too worn or wrong-sized. The anchor ends up loose, and the whole installation fails. Fresh bits and precise sizing are non-negotiable.
Marine and Coastal Applications
In salt-air environments, I exclusively use 316 stainless steel (marine grade) rather than 304. The extra corrosion resistance is worth every penny. I also double-check that all washers, nuts, and bolts are the same grade—mixing metals accelerates corrosion through galvanic reaction.
Common Mistakes Even Experienced DIYers Make
Let’s talk about the mistakes I’ve made and seen others make repeatedly:
Using too much speed: Slow and steady wins with stainless steel. High RPMs generate heat, which accelerates galling.
Skipping the lubricant: “Just this once” becomes “why is my bolt seized?” every single time.
Mixing fastener grades: Using a 304 bolt with a 316 nut seems harmless but creates a weak point prone to corrosion.
Reusing damaged fasteners: If you stripped it partway, throw it out. Trying to salvage a $0.50 screw costs you time and frustration.
Over-tightening in the name of security: Tighter isn’t stronger with stainless steel—it’s just stuck.
The Long-Term Payoff of Proper Installation
Here’s what proper stainless steel fastener installation gets you: deck railings that are still solid after ten years, outdoor light fixtures that don’t corrode, and marine equipment that survives saltwater exposure.
I have projects from over a decade ago where every single fastener is still in perfect condition. No rust stains bleeding down the wood. No seized bolts requiring angle grinders to remove. No structural failures from corroded connections.
That’s the difference between doing it right and doing it fast.
Your Action Plan for Perfect Installation Every Time
Start with the right materials: quality stainless steel fasteners matched to your application, proper drill bits, and good lubricant. Prepare proper pilot holes. Apply anti-seize. Tighten with control and patience. Use torque specifications for critical applications.
Follow this process, and your stainless steel installations will outlast the materials you’re fastening together. Skip steps, and you’ll understand why some DIY projects fail while others endure.
The choice is yours. But if you want installations that last, treat stainless steel fasteners with the respect they demand. Your future self—the one who isn’t drilling out seized bolts or replacing corroded deck screws—will thank you.
Now get out there and build something that lasts.
10 SEO-Optimized FAQs: Installing Stainless Steel Fasteners
1. What is the best way to prevent galling when installing stainless steel fasteners?
Preventing galling in SS fasteners requires a multi-step approach that I’ve refined over years of installation work. First, always apply a high-quality anti-seize compound or marine-grade lubricant to the threads and under the bolt head before installation. Second, use a slow installation speed—high RPMs generate friction heat that accelerates galling. Third, ensure you’re using the correct fastener grade for your application; mixing 304 and 316 stainless steel increases galling risk. Finally, never reuse stainless steel fasteners that have been previously tightened, as the threads may already have microscopic damage. In my experience, skipping lubrication is the number one cause of seized stainless steel bolts, so this step is absolutely non-negotiable for professional results.
2. Do I really need special tools for installing stainless steel screws?
Yes, and here’s why: standard tools will either fail quickly or damage your fasteners. For tools for installing stainless steel screws, you need impact-rated drill bits (regular bits dull almost immediately on hardened stainless steel), a variable-speed drill or impact driver for precise control, properly sized drivers that fit snugly to prevent stripping, and a torque wrench for structural applications. I also strongly recommend keeping anti-seize compound and a countersink bit in your toolkit. Can you get away with regular tools? Maybe for one or two screws, but you’ll end up with stripped heads, broken bits, and frustration. The investment in proper tools pays for itself on your first major project—I learned this after ruining a dozen fasteners and three drill bits on my first deck build.
3. How tight should I tighten stainless steel bolts to avoid damage?
Tightening stainless steel bolts properly requires understanding that stainless steel needs 30-40% less torque than comparable carbon steel fasteners due to higher friction coefficients. For hand-tightening, stop when the fastener is snug with no play but before you’re straining to turn it. For critical structural applications, always use a torque wrench with these approximate values: 1/4″ bolts need 6-9 ft-lbs, 5/16″ bolts need 11-17 ft-lbs, 3/8″ bolts require 20-30 ft-lbs, and 1/2″ bolts need 45-70 ft-lbs. These are general guidelines—always verify with manufacturer specifications when available. The biggest mistake I see is people applying “more is better” logic, which leads to galling, thread stripping, or snapped bolts. With stainless steel fastener torque tips in mind, remember that proper torque creates secure connections without damaging the fastener.
4. What’s the difference between 304 and 316 stainless steel fasteners for outdoor use?
When selecting corrosion resistant screws for outdoor use, understanding the grade difference is crucial. 304 stainless steel (also called 18-8) contains 18% chromium and 8% nickel, offering excellent corrosion resistance for most outdoor applications like decks, fences, and outdoor furniture in typical climates. However, 316 stainless steel (marine grade) adds 2-3% molybdenum, which dramatically increases resistance to saltwater, chlorine, and coastal environments. For DIY home hardware installation in areas within 10 miles of the ocean or for pool equipment, I exclusively use 316 grade. Yes, it costs about 40-60% more, but I’ve seen 304 fasteners start showing corrosion in coastal areas within 18 months. For inland applications without salt exposure, 304 is perfectly adequate and more cost-effective.
5. How do I install stainless steel anchors in concrete or brick walls?
Stainless steel anchors installation in masonry requires precision for maximum holding power. First, drill the hole to the exact diameter specified by the anchor manufacturer—even 1/32″ off compromises holding strength. Use a quality carbide masonry bit and drill to the proper depth (usually 1/4″ deeper than anchor length to accommodate dust). Clean all dust from the hole using compressed air or a vacuum; debris prevents proper seating. Tap the anchor flush with the surface using a hammer and punch—never use a drill to force it in. For wedge anchors, tighten the bolt to the specified torque, which expands the anchor against the hole walls. For sleeve anchors, the fastener expansion happens as you tighten. I always test the installation by attempting to wiggle it before mounting anything heavy. A properly installed stainless steel anchor in solid concrete will outlast the structure itself.
6. Should I pre-drill pilot holes for stainless steel screws in wood?
Absolutely yes—pre-drilling pilot holes for stainless steel screws is mandatory, not optional, even in softwoods like pine or cedar. Stainless steel is harder than regular steel screws, creating more friction during installation. Without pilot holes, you risk split wood, broken screw heads, or stripped drive slots. For softwood, drill a pilot hole about 90% of the screw’s core diameter (the solid shaft under the threads) to a depth of about two-thirds the screw length. For hardwoods like oak or mahogany, drill to the full screw depth at the full core diameter. I use a drill bit gauge to ensure accuracy—eyeballing it leads to either loose connections or cracked material. This extra step takes minutes but prevents hours of repair work. When doing DIY home hardware installation with stainless steel, pilot holes are your insurance policy against failure.
7. Can I use stainless steel fasteners with pressure-treated lumber?
Yes, and you absolutely should—stainless steel fasteners are ideal for pressure-treated lumber and are often code-required for structural applications. Modern pressure-treated wood contains copper-based preservatives (ACQ or CA) that are highly corrosive to regular galvanized fasteners. I’ve seen galvanized deck screws corrode completely through in less than five years on treated lumber. Stainless steel, especially 304 grade or higher, resists this chemical corrosion effectively. For corrosion resistant screws for outdoor use with treated lumber, use minimum 304 stainless steel for non-structural applications and 316 grade for structural connections or coastal areas. Always pre-drill pilot holes, apply anti-seize lubricant to prevent galling, and ensure the fastener penetrates at least 1.5 inches into the supporting member for proper hold. The extra cost of stainless steel is negligible compared to rebuilding a deck in five years.
8. What causes stainless steel fasteners to seize, and how can I remove them?
Stainless steel fasteners seize primarily due to galling—a cold-welding process where metal transfers between threads under pressure and friction. This happens when you skip lubrication, over-tighten, use high installation speeds, or install in dirty conditions. Prevention is far easier than removal: always use anti-seize compound and tighten slowly with proper torque control. If you’re dealing with an already-seized fastener, here’s my extraction process: First, apply penetrating oil and let it soak for several hours (or overnight for severe cases). Second, try gentle back-and-forth motion rather than pure removal force. Third, apply heat with a propane torch if the application allows—thermal expansion can break the bond. If that fails, use a bolt extractor set or, as a last resort, carefully drill out the fastener. I’ve spent hours removing seized stainless steel bolts that would have taken 30 seconds to install properly with lubricant.
9. Are impact drivers or regular drills better for installing stainless steel fasteners?
For how to install stainless steel fasteners efficiently, both tools have their place, but I reach for my impact driver for 90% of installations. Impact drivers deliver rotational force in bursts, which reduces cam-out (the driver slipping out of the screw head) and provides better control with hard materials. However—and this is critical—you must use the lowest torque setting and variable speed control. The key advantage is that impact drivers maintain consistent pressure without requiring you to lean heavily on the drill, which reduces fatigue and improves accuracy. For delicate work, finishing screws, or situations requiring precise feel, I prefer a variable-speed drill with clutch settings. Never use a standard drill at high speed for stainless steel; you’ll generate excessive heat and increase galling risk. Whichever tool you choose, slow and controlled beats fast and powerful every single time with stainless steel.
10. How do I choose the right length and diameter for stainless steel screws?
Selecting proper fastener dimensions is critical for structural integrity and longevity in DIY home hardware installation. For screw length, follow the rule of thirds: two-thirds of the screw length should penetrate the base material (the piece you’re fastening into). For example, when attaching 1-inch deck boards to joists, use a minimum 2.5-inch screw (1 inch through the deck board plus 1.5 inches into the joist). For diameter, match the load requirements—#8 screws for light-duty applications like trim, #10 screws for standard deck boards and general construction, and #12 or 1/4″ lag screws for structural connections. Consider the material thickness: screws that are too thick can split wood, while too-thin screws won’t provide adequate hold. When installing corrosion resistant screws for outdoor use, I always err on the side of slightly longer rather than shorter—you can countersink deeper if needed, but a screw that’s too short compromises the entire connection. Check local building codes for structural applications, as many jurisdictions specify minimum fastener sizes for decks and outdoor structures.